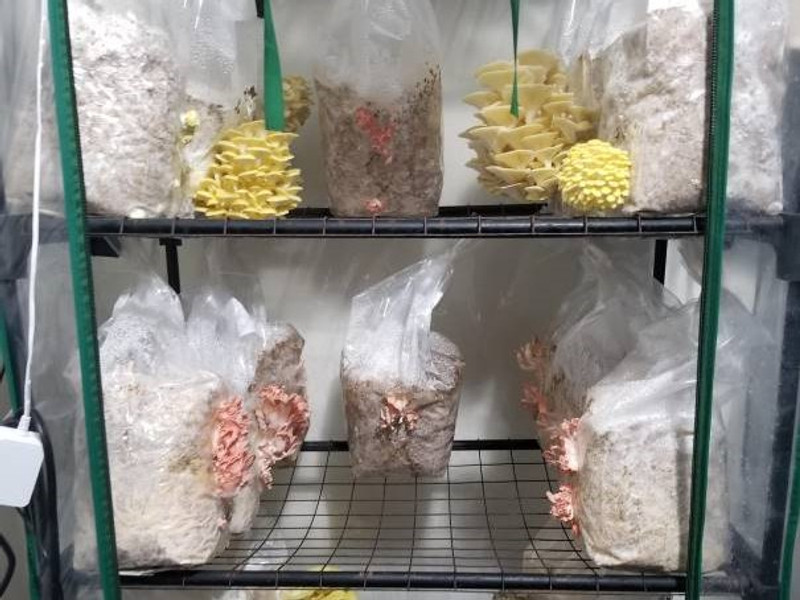
How to Build a Martha Tent Mushroom Fruiting Chamber
Posted by Troy Cosky, Founder FunGuy Grow Supply on 19th Apr 2023
Mushroom cultivation can be a rewarding and entertaining hobby. But it's essential to give utmost attention to the environment in which the mushrooms grow. You want them to thrive and produce well! One of the most critical factors is the fruiting chamber. It provides optimal conditions for your mushrooms' growth rate and productivity levels. Among other options, a Martha Tent Mushroom Fruiting Chamber or Martha tek an excellent choice due to its durability, cost-effectiveness coupled with flexibility accommodating multiple species at once. In this article we will help you create your own practical and easy-to-make Martha Tent Fruiting Chamber.
Humidity is Key in Mushroom Growth
Having the right humidity levels for growing mushrooms in a fruiting chamber is imperative to success. It's recommended you choose the appropriate size and type of humidifier for your mushroom growing setup. There are several types available such as ultrasonic or evaporative or steam humidifiers. Ultrasonic’s often win points due low noise output while Evaporative ones use a fan to moisten with its latest wick inventions! Meanwhile, Steam humidifiers heat water until water is converted into vapors and adds extra moisture levels.
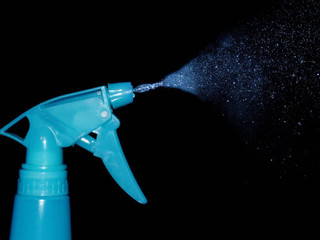
When selecting, it's important to consider drawer space limits; select one that will fit snugly within without overflowing real estate tricks work best so research possible pick options carefully! Make sure also to take note of refill capabilities too - larger tanks might require less frequent top-ups limiting annoyance – pay attention here then sit back knowing you’re doing just fantastic no matter which one you pick!
Step Up Your Martha Tent with the Best Humidifiers!
Achieving the ideal conditions in your martha tent or indoor greenhouse starts with the right humidifier. Whether you're using martha tents or advanced equipment, our guide reveals the top humidifier choices for optimal growth conditions.
Click here to learn which humidifier complements your setup best!
Fresh Air Exchange
In the world of mushroom cultivation, proper and deliberate airflow is a necessity. Without it, our darling fungi not only suffer slow growth but they can even suffocate due to carbon dioxide build-up! This is where fresh air exchange becomes essential throughout your growing process. Installing a modest bathroom ventilation fan promotes effective airflow and offers much-needed relief in replacing oxygen levels within your tent environment – adjusting those all-important carbon dioxide ratios so that mushrooms can flourish! The flow of air facilitates gas exchange for fungal respiration as they [fungi] utilize some oxygen (O2) while releasing Carbon-di-oxide (CO2) - similar to how humans exchange breath during the inhalation-exhalation processes.

Charmingly referred to as ‘The Chimney Effect’ by avid growers because it creates an upward draft drawing out stale carbon dioxide-laden air whilst simultaneously drawing in new high-oxygen content air from below keeping them happy & healthy So get yourself a fan setup inside your mushroom tent today and watch those little spores blossom into delicious home-grown mushrooms rich with unique flavors patiently waiting to be added to tonight's meal plan!
Mastering Temperature Management for Mushroom Growth
If you want to maximize your yield potential in mushroom cultivation, proper temperature maintenance is essential. Every species of fungi requires their own unique range of temperatures to flourish under. To ensure an effective growing environment despite the variance in fungus needs, let's keep a range between 55°-80°F at all times. This will help create the perfect habitat for most typical mushrooms while also giving room for specific outliers set outside that spectrum! This ensures no issues from low temperatures stunt or too much heat affecting yields and quality.
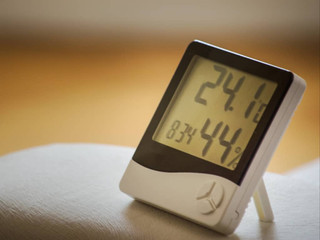
Effective utilization of tools like supplemental heat pads and heated water humidifiers can help maintain appropriate internal environments as per requirements with ease too – making conservative results possible even out-of-season! So don't overlook simple precautions and stay ahead with adequate environmental measures taken towards successful fruiting within just weeks!
Light Presence/Supplementation
Mushroom cultivation involves a complex process with peculiar elements that influence how fruits bed down for successful growth. Light may not be essential like photosynthesis is to plants; however it has its own unique role in influencing the appearance and position of fungi as they spring forth from your fruiting chamber! Having locations where indirect sunlight finds its way into your tent or surrounding environment is crucial in augmenting natural lighting conditions conducive to mushroom growth. Moreover, strategically placed LED panels/fluorescent bulbs on either side of the mushroom grow setup inside/outside respectively can ensure maximum exposure & visibility required by certain species!

The right balance between artificial and natural light sources will help encourage healthy fructification with mushrooms positioning themselves optimally within their environment - visible enough for pickers but still enjoying safe/dark comfortable spaces necessary to thrive. Once you have established suitable illumination levels important for top quality yields over dimly lit/buried counterparts- start picking those beautiful matured specimens feeling proud of yourself!
Plastic Sheeting
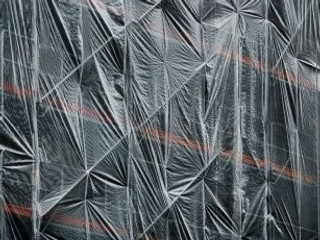
Choosing the appropriate plastic sheeting for your fruiting chamber is of essential importance. It should be durable with a recommended thickness of 4-6 mils to prevent contamination yet still allow light penetration for optimum growth progression whilst also being compliant with food-grade standards. Note that not all plastics suit mushroom cultivation as some block required lighting and others can emit chemicals hazardous to fungal development. Select suitable high-quality material tested and preferred by other mushroom growers to effectively produce optimal yield from your martha fruiting chamber without worry!
Sterilizing Mushroom Substrate
Sterilizing the substrate is a critical part of any successful mushroom growing process. Skipping this important step can lead to unwanted bacteria or fungi contamination which essentially sabotages your entire harvest – so don’t forget! Employing a suitable sterilization method before inoculating with the precious spoils is essential for fruitful yields.
One of the most effective ways growers use to sterilize their untreated substrate successfully is by employing a pressure cooker. This high-pressure boiling process ensures that all pathogens are eliminated when performed correctly. For users who opt-out on this rather expensive approach may also choose steam sterilization instead while some others might prefer chemical methods according to preference.

Regardless of which procedure you employ though, there are proper and necessary steps to follow. These include using sterile equipment during the cleaning phase, properly sealing the substrate once complete, and cooling it down beforehand prior to adding in those long-awaited mushroom spores or spawns - doing these will surely upgrade your chances of harvesting plentifully lucratively with minimal risk!
Create Your Very Own Martha Tent Fruiting Chamber for the Ultimate in Mushroom Growing Results!
Here are some tools that you'll need:
- A tent or PVC pipes along with connectors
- Plastic shelving unit with dimensions of at least 6 ft x 3 ft x 2 ft
- Clear plastic sheeting (6 mil or higher)
- Zip ties
- Velcro tape
- Humidifier
- Thermostat
- Temperature and humidity monitor
- Fan
- Grow Lights
- Mushroom grow bags or containers
- Sterilized mushroom substrate and mushroom spores
Let's get started on building your own custom-made space today!
Step 1: Crafting Your Frame
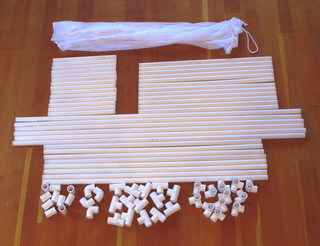
If you're using a tent as a base, then it's just following some simple instructions. However, if not, we recommend using PVC pipes and connectors to make a rectangular structure in which your mushrooms can bloom! Depending on how much room you have, don’t forget to consider accommodating different quantity levels of growth! Afterwards, simply wrap with plastic sheeting.
Step 2: Setting Up the Humidity
For successful mushroom growth, a humidifier is necessary. Once you have your tent or PVC frame covered in plastic sheeting, grab a suitable tool and install your humidifying device. Ensure it has access to water so it can produce a suitable level of moisture – too much dryness will hinder growth! With this important aspect taken care of, your fungi should be well on their way to experiencing optimal growing conditions. Happy Mushroom Growing!

Step 3: Regulating Temperature for the Perfect Environment
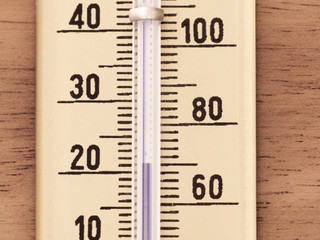
Proper temperature regulation is key to ensuring success in mushroom cultivation. Installing a thermostat within your fruiting chamber will facilitate an appropriately warm and cozy atmosphere that encourages fungal growth. Insert it into your martha tent setup and set according to recommended temperatures between 60-75°F. This varies depending on species but should be well publicized by your supplier or included with spore kit instructions! With ideal environmental conditions now regulated – watch as those small sprouts develop into flourishing mycelium colonies.
Step 4: Circulating Fresh Air Exchange for Maximum Growth
Mushroom growth is facilitated by the proper circulation of air within the martha grow tent. Installing a fan will help in dispersing moisture and maintaining an evenly distributed temperature throughout your setup! Be considerate of where you place it so that it blows around your martha tent setup, keeping everything nicely aerated with a lovely breeze to aid in maximum growth potential. With optimal conditions maintained thanks to good airflow – happy mushrooms are just waiting to be harvested!

Step 5: Brightening Things Up with Artificial Light
Light is a fundamental element of successful mushroom growth! Adding grow lights above the martha grow tent will lend that extra brightness needed to facilitate their flourishing. Place them in a suitable position and set on timer according to nature’s daylight cycle for optimal efficiency – many species require different lighting requirements so be sure you know what yours specifically needs! With wonderful glowing light added as an ingredient to the mix, your fungi can now easily flourish without being blinded by darkness - they are good just like this!

Step 6: Inoculating Your Substrate for Maximum Yield
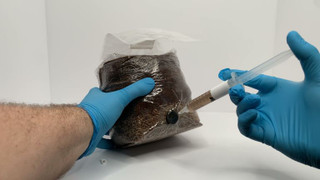
Your martha fruiting chamber is now almost complete! Make sure to add your desired mushroom spores or spawn to the nutrient-rich substrate before placing them in the chamber. The inoculation process involves allowing these spores and substrates to mingle for a few weeks which will give enough time for growth activity – be patient and let nature take its course! Once this has been achieved, it should be ready to go into your fruiting chamber with full confidence that maximum yield is just within reach.
Step 7: Keep a Close Eye on the Environment
Being vigilant and observing your operational infrastructure is crucial to success in mushroom growing! After adding substrate - it's time to keep an eye on environmental factors like temperature, humidity and light exposure regularly. Any changes should be quickly adjusted so that optimal conditions can continue to facilitate maximum growth potential within your fruiting chamber. Regular observation will provide insights into whether you need new equipment or just a simple tweak here and there – either way it’s good practice for long-term successful mushroom growth practices!
Conclusion:
Mushroom cultivation can be an amazing hobby with many rewards - both in terms of taste and nutrition. With this martha tek guide, creating a custom built Martha Tent Mushroom Fruiting Chamber has never been easier! This budget-friendly and simple to build structure provides maximum optimization for successful mushroom growth practices. Following our DIY Martha Tent step-by-step guide will give you the tools necessary to create a safe and controlled environment that facilitates ideal growing circumstances. Take pride in your new creation as healthy and nutritious mushrooms are now just within reach – It's time to get your fungus on!
Congratulations on setting up your new Martha Tent Mushroom Fruiting Chamber! However, even with the perfect growing space for fungi, issues can arise down the road. It is essential to troubleshoot these problems promptly and efficiently to avoid disappointment. Here are some commonly asked questions that may help you identify and solve mushroom growth issues in your mushroom tent:
Visit Funguy Grow Supply today and explore our wide range of mushroom cultivation products. From mushroom grow bags to spore syringes, we've got everything you need to take your Martha Tent Mushroom Fruiting Chamber to the next level! Use our mushroom substrate calculator for optimal growth potential - shop now!
Frequently Asked Questions
What would skinny stems or corally-looking growth imply about my yield?
These symptoms may indicate higher carbon dioxide levels that can be addressed to allow optimal fungal growth.
How do I identify overabundant carbon dioxide or moisture in my Martha tent?
If you observe fuzzy stems, it could suggest excessively high CO2 and moisture content.
What causes browning caps, difficulties achieving proper colonization/harvest too late - even if conditions are followed right?
Lack of enough humidity in your grow space might cause these concerns.
Why do pale fruiting caps occur as signs of poor lighting and a hot temperature?
These environmental factors lead to unfavorable conditions that affect the production of healthy fruiting bodies.
What should I do if there is no presence of colonies at all?
Check off excessive carbon dioxide presence observantly one by one until life reigns again!
How long does harvesting after Mycelium-pinned fungus usually last before using some ceiling projects?
Temporary drop-in humidity just got served pins this time around.
What is the benefit of using a DIY Martha Tent for mushroom growing setup?
A DIY Martha Tent allows you to customize and create an optimal environment for growing mushrooms at home, which can result in healthier yields.
How long does it take to set up a Martha Grow Tent?
Setting up a Martha Grow Tent may vary depending on your familiarity with tools but should take anywhere from 2-4 hours, making it a convenient option for those who want to get their mushroom-growing adventure started quickly.
Do I need any special skills to set up a Martha Tent Mushroom Fruiting Chamber?
Not at all! With the right materials and tools, anyone can set up this mushroom grow setup. Just follow the instructions carefully.
Make sure you observe and adjust accordingly where necessary! These observations play a fundamental role in creating conducive environments that yield abundant harvests each time around!

