Techniques to Improve Life Span of Your "All-in-One Mushroom Grow Bag"
Posted by Troy Cosky, Founder FunGuy Grow Supply on 25th May 2023

Extend the Life of Your ' All-In-One Mushroom Grow Bag ' Kit Outdoors
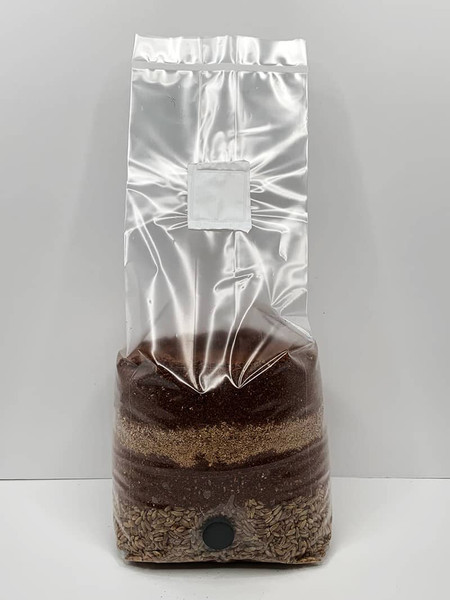
Want to maximize the lifespan of your ' all in one mushroom grow bag ' kit outdoors? Look no further! In this article, we'll show you how to extend the life of your kit through tried and tested techniques.
From reusing the kit for optimal growth to burying it for protection, we've got you covered. So, get ready to take your mushroom-growing adventure to the next level and enjoy a bountiful harvest!
Key Takeaways
- Protect the kit from extreme weather conditions
- Provide proper ventilation for the mushrooms
- Maintain the right humidity levels for growth
- Prevent contamination from pests and other organisms
Choosing the Right Mushroom Strain
Selecting the right mushroom strain for your grow bags is crucial. Different strains have varying environmental requirements and growth patterns. Research and choose a strain that matches your local climate and the setup of your grow area, especially if you're using a liquid culture to inject the spores into the mushroom substrate.
Proper Sterilization and Sanitization
Before filling the bags, it's imperative to sterilize and sanitize them thoroughly. Proper sterilization ensures that the injection part of the spore syringe remains contamination-free . Any contamination at this stage can significantly reduce the life span of your grow bags. Utilize a pressure cooker or an autoclave to sterilize the substrate and bags to eliminate harmful microorganisms.
Filling and Sealing the Bags
When filling the bags with substrate, ensure that you pack it evenly and avoid over compacting. Leave enough room for the mycelium to spread and colonize. After filling, seal the bags securely to prevent contamination and maintain the right moisture levels.
Technique 1: Reusing the Mushroom Grow Bag Outdoors for Optimal Mushroom Growth.
How can you reuse your 'All In One Grow Bag' Mushroom Kit outdoors to achieve optimal mushroom growth? One great way to optimize mushroom growth is through the use of fern fronds. These plants not only create a beautiful green space around your all-in-one mushroom grow bag , but they also aid in creating humidity within a microclimate perfect for fungi reproduction. Simply utilize these fronds nearby your kit location to promote optimal mushroom growth.

When moving your mushroom kit outside, it's important to unwrap any extra packaging material from the mushroom block and recycle it. Next, leave the block in its plastic bag and carefully place it in a shady spot where it'll receive rainfall. Keeping an eye on your grow kit after rain or during humid days is crucial, as this is when fungi thrive best.
But why move your mushroom kit outside in the first place? Well, outdoor conditions vary greatly from indoor ones – sunlight exposure differences alone will significantly impact fruiting patterns! Fungi require exposure to natural light for proper vitamin D synthesis, particularly ultraviolet light (UVB), which cannot penetrate through window glass indoors.
Not only that, but moving your kit outdoors provides microbes with fresh air, something lacking indoors. This fresh air produces beneficial effects on decomposition rates and enhances the substrate layers formed over time. The result? Even tastier mushrooms than you thought possible!
Technique 2: Burying the Kit for Extended Lifespan and Protection
To extend the lifespan and protect your 'All In One Grow Bag' Mushroom Kit outdoors, consider burying it in a shady area of your garden. Burying the kit allows the mushroom block to draw moisture from the surrounding soil, creating an ideal growing environment. It also provides protection from direct sunlight and harsh weather conditions. Follow these simple steps to bury your mushroom kit:
| Step | Instructions |
|---|---|
| 1 | Remove the block from the box and recycle any packaging materials. |
| 2 | Carefully remove the plastic bag around the block, being cautious not to damage the mycelium network. |
| 3 | Find a shady area in your garden where you want to bury the kit. |
| 4 | Dig a hole slightly bigger than the size of your mushroom block. |
| 5 | Gently place the mycelium network in the hole and cover it with one inch of soil or mulch. |
| 6 | Water your buried block regularly, ensuring it doesn't dry out completely. |
| 7 | Periodically check on your buried block after humid days or rainfall for fruitful results! |

By burying your all-in-one grow bag, you create a self-sustaining growing environment for your mushrooms. The mycelium network will draw moisture from the surrounding soil, providing the necessary hydration for optimal growth. Additionally, the shade provided by the garden helps protect the block from excessive sunlight, which could be detrimental to its development.
Now that you know how to bury your mushroom kit for extended lifespan and protection, let's explore technique 3: inoculating containers for creative cultivation methods. This technique allows you to expand your mushroom growing possibilities and experiment with different growing mediums and containers.
Technique 3: Inoculating Containers for Creative Mushroom Cultivation Methods
To inoculate containers for creative cultivation methods with your 'All In One Grow Mushroom Bag' Mushroom Kit, gather the necessary materials and choose suitable containers with good airflow and drainage. Here's how you can get started:
Gather Your Materials and Choose Your Container:
- Collect all the materials you'll need for this project, including your 'All In One Grow Bag' Mushroom Kit, a suitable container with good airflow and drainage, and any additional tools or equipment.
- Look for containers that can retain moisture without trapping too much humidity. This will help create the ideal environment for your mushrooms to grow.
Soak the Substrate:
- Take your chopped straw substrate and soak it in water for about 20 minutes to an hour, until it becomes fully saturated.
- Drain any excess water from the substrate. Too much water can lead to anaerobic conditions within the container, which can be detrimental to the growth of your mushrooms.
Measure the Hydration Level:
- After soaking the substrate with distilled water, gently squeeze it to measure its hydration level.
- The ideal moisture level is 'field capacity,' meaning it should contain enough moisture that no free-standing water remains, but it should still feel damp when squeezed hard.
Alternate Layers of Substrate and Crumbled Mushroom Block:
- Start layering alternate layers of crumbled mushroom block and substrate inside your chosen container.
- Make sure that both the top and bottom layers are complete layers of substrate to provide a stable base for your mushrooms to grow.
Lightly Compact the Straw:
- Once you have built each layer, lightly compact the straw using your fingers or a tool like a potato masher.
- This step helps remove any air pockets that may be present between the layers, ensuring proper colonization of the substrate.
Place Your Container in A Shady Area and Water Regularly:
- Find a shaded area where your container can be placed, away from direct sunlight that can dry out the mushrooms.
- Water your container regularly to maintain the moisture levels required for optimal mushroom growth.

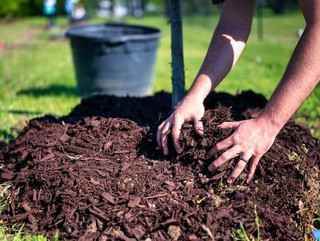
Technique 4: Inoculating Mulch for Visual Interest and Successful Harvest
To extend the life of your ' All-In-One Bags ' Mushroom Kit outdoors, incorporate the mushroom kit's spawn into the mulch in your garden. This technique not only adds visual interest but also provides numerous environmental benefits from the added organic material. And with the resilience of oyster mushrooms, this technique ensures a successful harvest for beginners and experienced growers alike.

Here's a step-by-step guide to help you get started:
- Gather fresh mulch and oyster kits.
- Spread an even layer of mulch in a shady area, making sure it's not too thick.
- Evenly distribute crumbled mushroom blocks on top of the mulch.
- Repeat these layers until you've used up all of your materials.
At this point, you can either mix them with your hands or let them sit as is covered with a top layer of mulch. Remember, mushrooms thrive in moist environments, so make sure to water generously for optimal flushes.
Regular monitoring is crucial. Avoid letting the patch dry out by watering as needed. Keep track of any changes or growth in the area - this will be an essential indicator for knowing when it's time to harvest!
Incorporating the mushroom kit's spawn into mulch not only enhances the aesthetic appeal of your garden but also provides a sustainable way to grow delicious oyster mushrooms. By following these simple steps, you can enjoy a bountiful harvest and a visually stunning garden. Give it a try and watch your outdoor space come to life with the beauty of mushrooms!
Conclusion: Taking Your Mushroom-Growing Adventure to the Next Level
Take your mushroom-growing adventure to the next level by exploring new techniques and expanding your cultivation beyond the initial purchase of your 'All In One Grow Bag' Mushroom Kit. Here are some ideas to help you on your journey:
- Try different mushroom species: Experiment with growing different varieties of mushrooms to expand your knowledge and enjoyment. From oyster mushrooms to shiitake and lion's mane, each species has its own unique flavor and texture.
- Create your own spawn: Instead of relying solely on purchasing spawn, consider learning how to create your own. This will give you more control over the cultivation process and allow you to experiment with different substrates and growing conditions.
- Build a mushroom fruiting chamber: If you're serious about mushroom cultivation, consider building a dedicated fruiting chamber. This controlled environment will provide optimal conditions for your mushrooms to grow and thrive, resulting in higher yields and better quality mushrooms.
All-in-One Mushroom Grow Bag Magic Awaits
Visit FunGuy Grow Supply for the Best Mushroom Growing Supplies and Start Maximizing Your 'All In One Grow Bag' Mushroom Kit's Lifespan Today!
Frequently Asked Questions
Can I Reuse the Mushroom Grow Kit Multiple Times?
Yes, you can reuse the mushroom grow kit multiple times. Simply follow these steps: After harvesting your mushrooms, remove any remaining fruiting bodies and gently shake off any loose substrate. Place the bag in a cool, dark place and mist it daily to maintain humidity. In about two weeks, you should see new mushroom growth. Repeat this process until the substrate is depleted. With proper care, you can extend the life of your grow kit and enjoy multiple harvests.
How Long Does It Take for Mushrooms to Grow After Burying the Kit?
After burying the kit, it usually takes about 10-14 days for mushrooms to start growing. Make sure to maintain the right conditions, such as keeping the soil moist and providing enough light and ventilation. Remember to follow the instructions provided with the kit for the best results. With proper care, you can enjoy multiple harvests from your mushroom grow kit and extend its life outdoors.
Can I Grow Different Types of Mushrooms in the Same Container?
Yes, you can definitely grow different types of mushrooms in the same container. By using the 'All-In-One Grow Bag' Mushroom Kit outdoors, you have the flexibility to experiment with a variety of mushroom species. Simply follow the instructions provided with the kit and make sure to provide the appropriate growing conditions for each type of mushroom. With proper care and attention, you can enjoy a diverse harvest of mushrooms from your container.
What Type of Mulch Is Best for Inoculating?
To extend the life of your 'All-In-One Grow Bag' Mushroom Kit outdoors, it's important to choose the right type of mulch for inoculating. The best option is hardwood mulch, which provides a suitable environment for mushroom growth. Make sure to spread a layer of mulch over the grow bag, ensuring proper moisture retention and preventing the growth of unwanted weeds. This will help maintain the ideal conditions for your mushroom kit and maximize its lifespan outdoors.
How Can I Store the Mushroom Grow Kit When Not in Use?
When not in use, you can store your mushroom grow kit in a cool and dry place. Make sure to keep it away from direct sunlight and moisture. A pantry or a basement would be ideal. Remember to check the expiration date and follow any specific storage instructions provided by the manufacturer. By properly storing your grow kit, you can extend its life and ensure that it remains in good condition for future use.
Can I use liquid culture with any mushroom strain?
Liquid culture can be used with various mushroom strains, but it's essential to research and choose strains that are compatible with this inoculation method for the best results.
What is the purpose of an injection port in grow bags?
An injection port allows you to introduce spores or liquid culture into the mushroom substrate without exposing it to external contaminants, ensuring a successful and contamination-free inoculation process.
References
- Stamets, P. (2005). Mycelium Running: How Mushrooms Can Help Save the World. Ten Speed Press.
- Suwannarach, N., Kumla, J., Zhao, Y., & Kakumyan, P. (2022). Impact of Cultivation Substrate and Microbial Community on Improving Mushroom Productivity: A Review. Biology, 11(4), 569. https://doi.org/10.3390/biology11040569

