Monotub Mushroom Grow Guide | How To Make A Monotub
Posted by Troy Cosky, Founder FunGuy Grow Supply on 8th Sep 2023
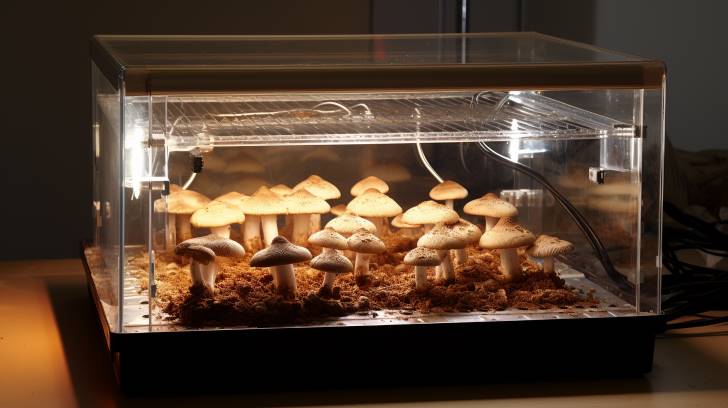
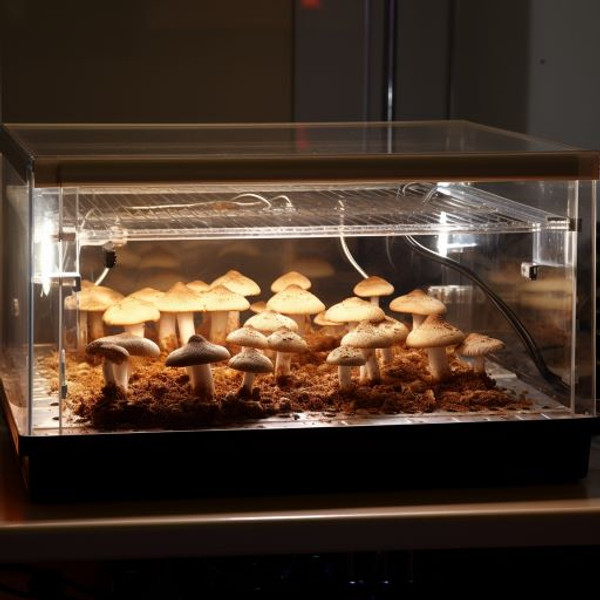
Monotub Mushroom Fruiting Chamber: Ultimate Guide
You're about to embark on a fascinating journey into the world of monotub growing. This guide won't only provide you with step-by-step instructions, but it'll also deepen your understanding of this unique cultivation method. So whether you're an amateur mycologist or a seasoned pro, let's dive into the science behind maximizing your yield with a monotub.
Key Takeaways
- Monotub is an effective method for growing psilocybin mushrooms, creating a self-contained micro-ecosystem for optimal growth.
- The design and construction of a monotub, along with proper substrate selection, are crucial for successful yields.
- Regular maintenance, monitoring of temperature and humidity levels, and troubleshooting are essential for preventing contamination and ensuring healthy growth.
- Optimizing conditions such as misting, humidity levels, temperature, and light are necessary for maximizing yield and fruiting cycles.
Monotub Mushroom Growing: Maximizing Space and Yield
Let's dive into the basics of the monotub grow guide, where you'll learn how to get started with your mushroom cultivation journey. The monotub is a highly effective method for growing psilocybin mushrooms. This DIY technique, known as monotub tek, leverages basic materials and equipment to create optimal conditions for maximum yield.
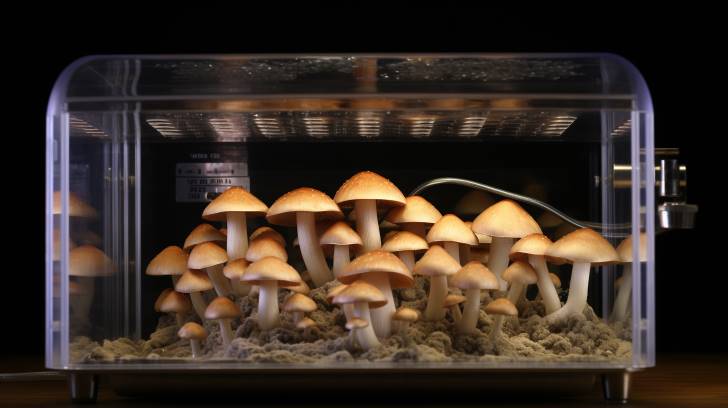
In essence, a monotub is a self-contained micro-ecosystem that provides an ideal environment for mushroom growth. It relies on construction principles that promote humidity retention and air exchange – critical factors in successful mushroom cultivation. With this setup, you can achieve large crops of high-quality mushrooms from the comfort of your own home.
The first step to building your DIY monotub involves gathering necessary materials such as a clear plastic container used for growing mushrooms, perlite or coco coir (for generating humidity), duct tape (to seal off light leaks), and colonized grain spawn (which will serve as the seed for your mushrooms). You'll also need polyfill or micropore tape to create filters for gas exchange.
Once you've got all these supplies together, it's time to construct your DIY monotub following the specifics detailed in the monotub tek part of our guide. This involves creating holes at strategic points on your tub that will be stuffed with polyfill or covered with micropore tape for air exchange while keeping contaminants out.
This introduction scratches just the surface of how to grow psilocybin mushrooms using this method; we'll delve deeper in subsequent sections of our comprehensive monotub grow guide. As you progress through each step meticulously implementing scientific best practices, you're setting yourself up for success on this fungi fascination adventure!
What is a Monotub?
A monotub's essentially a singular large tub, usually plastic, that's widely used in home-based mushroom cultivation due to its simplicity and efficiency. So what is a monotub? Picture a storage bin with an expertly crafted ecosystem within it, designed specifically for mushrooms to thrive.

The monotub design incorporates several key features. It has holes drilled into the sides for air exchange which are often filled with polyfill or some other type of breathable but contaminate-resistant material. The bottom layer consists of the monotub substrate: this is where your mycelium will colonize and eventually fruit. This substrate can be made from various materials such as straw, wood chips, or even coffee grounds. To ensure you have the perfect substrate depth and ingredient ratio for maximum mushroom yields, consider using a monotub substrate calculator.
The monotub mushroom growing method is revered by many growers because of its high potential yield. Compared to traditional methods like growing in jars or bags, the monoculture tub allows you to grow more mushrooms in less space because of its efficient use of surface area. With proper maintenance — maintaining correct temperature and humidity levels — you'll be rewarded with abundant flushes of mushrooms from your single tub.
But don't let the simplicity fool you; creating a successful monotub requires patience and careful attention to detail. You need to ensure that conditions inside the monotub remain optimal for mycelium growth without introducing contaminants that could ruin your entire crop.
In short, using a monotub means streamlining your mushroom-growing process while maximizing both space and yield potential. Armed with knowledge about plant life and dedication, you can make this simple tool work wonders in your own home-based cultivation setup.
Monotub Design
You'll find that the design of your cultivation setup plays a key role in determining the success of your mushroom yield. The monotub design you choose can significantly impact the growth and productivity of your fungi, making it crucial to understand how to make a monotub effectively.
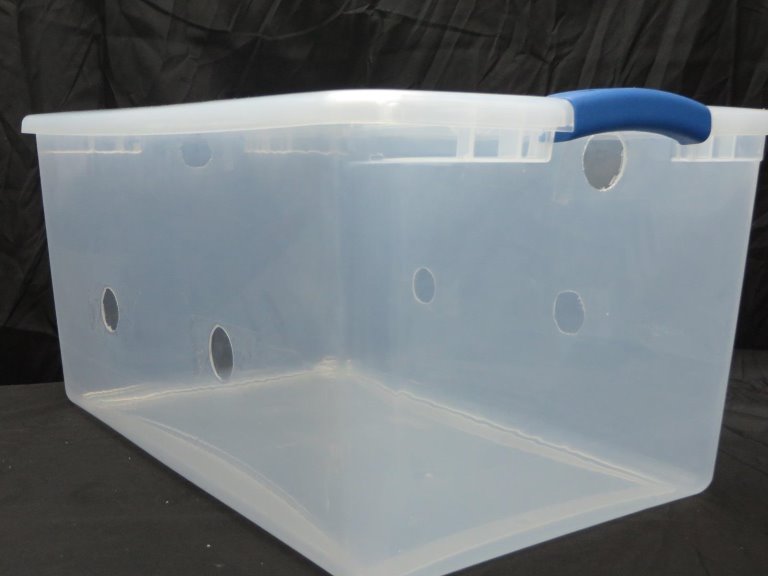
Here's a simple guide to help you understand:
- Monotub Fruiting Chamber: This is essentially the main body of your tub where substrate and spawn are mixed and left to colonize. It should be spacious enough to allow ample room for fruiting.
- Monotub Lid with Holes: The lid allows light penetration and gas exchange necessary for fruiting. Drill between 10-20 holes, depending on size, evenly distributed around all four sides.
- Polyfill or Monotub Filters: These act as makeshift filters allowing air exchange while preventing contamination from invading spores or bacteria.
- Opaque Liner: Using an opaque liner inside your tub prevents mushrooms from growing on the sides or bottom.
Your monotub grow room should maintain an optimum temperature range between 75°F - 81°F (24°C - 27°C). This environment encourages mycelium—the vegetative part of fungus—to colonize fully. A fully colonized monotub means that your substrate has been completely overrun by mycelium, which forms the basis for mushroom fruiting.
Remember not to pack down or compress your substrate within the tub; mushrooms need room to expand and breathe just like any other living organism. Additionally, keep an eye out for signs of contamination such as off-colors or strange smells emanating from your setup.
Understanding each step—from drilling holes in your tub lid to ideally stuffing them with polyfill—will help you create an effective growing space for mushrooms. Properly prepared and maintained, this design will provide ideal conditions for prolific mushroom yields. It's all about diligence in fine-tuning details that make successful fungus farming possible within a simple plastic tub!
Materials Needed to Make a Monotub
As you delve into the world of mushroom cultivation and monotub construction, your focus must be two-pronged—equipment and substrate. You'll find that selecting the right tools and equipment, such as Tupperware containers, plastic bag liners, drills for ventilation holes, and particulate filters is critical not just for creating a suitable environment but also for maintaining it. Simultaneously, choosing an appropriate substrate—a complex composition of materials like coco coir or horse manure—is equally crucial as it plays a pivotal role in offering essential nutrients required for growth.
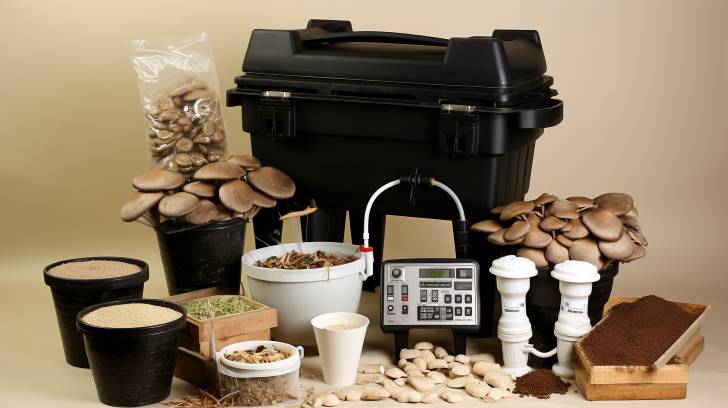
Equipment
In this part of the guide, we're focusing on the equipment you'll need for your Monotub grow project. As a mushroom grower, using a mushroom monotub vastly simplifies the process to grow your own mushrooms.
- Stanley knife and Lighter: These are essential for sterilizing and making precise incisions.
- Large pot and Pressure cooker: For preparing and pasteurizing your substrate.
- Tape measure, Marker pen, Micropore tape, Poly-Fil: Helps maintain ideal conditions within the mushroom grow tub.
Ensure you have all these essentials at hand before embarking on your mushroom cultivation journey. Remember, precision is key to achieving successful yields.
Having covered equipment preparation in detail, let's now transition into understanding 'substrate' - its significance in mushroom growth and how to prepare it effectively.
Substrate
Moving on from the equipment, let's dive into your substrate preparation. To successfully grow mushrooms in a monotub, you'll need to create an environment that mimics their natural growing conditions. This is where the PF Tek method comes into play.
The table below details the ingredients required:
| Ingredient | Quantity |
|---|---|
| Coco coir | Half a brick (325g) |
| Vermiculite | 5l |
| Cow manure | 3.75l |
| Water | 1.75-2l |
| Hydrated lime | As per requirement |
Combine these materials and sterilize them to form your spawn and substrate mix. Once inoculated with mushroom spawn, this will eventually lead to a fully colonized substrate - a key factor for thriving growth in your mono tub setup. So, gear up, and let's get our hands dirty!
Instructions for Building a Monotub
You'll need to mark and cut out holes in your tub before lining it with a trash bag for your monotub build. This initial step is vital in creating an optimal environment for indoor mushroom growth, ensuring they have adequate air exchange within the monotub fruiting chamber.
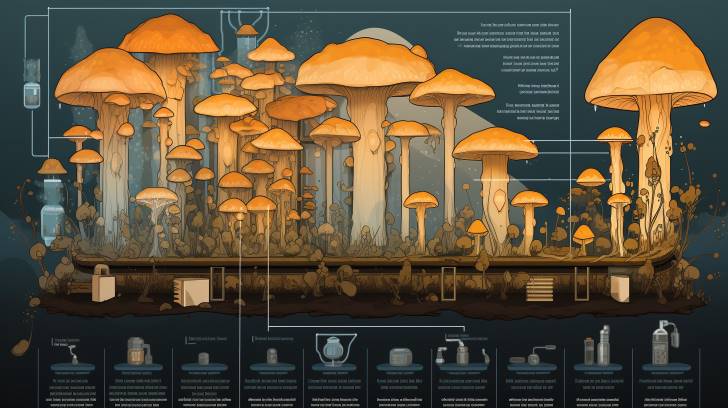
Here are detailed instructions for building a monotub:
- Begin by marking two holes 12cm from the bottom of your mushroom tub. Divide the length into thirds to determine the placement of these holes accurately. Additionally, mark another hole beneath each handle of the tub.
- Proceed to cut out these marked areas using a 1.5-inch (38.1mm) hole saw or drill bit. If you don't have either tool handy, you could use a heated Stanley knife with great care not to damage your tub.
- Next step: Line your tub's interior with a black trash bag neatly trimmed at the top just below the drilled holes on its longer side; secure it in place with tape ensuring a snug fit.
- Finally, fill your monotub with properly prepared substrate suitable for cultivating tek mushrooms.
By following these steps meticulously, you're setting up an environment that facilitates vigorous mycelium growth - leading ultimately to fruitful yields of healthy mushrooms.
These strategically placed holes will regulate humidity and gas exchange, both crucial factors that influence mushroom development within their new habitat – the mushroom tub.
Next up, line your freshly holed tub with a black trash bag; this acts as an internal barrier preventing light penetration which could trigger premature pinning of mushrooms on side walls rather than on the top substrate layer where it's desired most in monotubs.
Trim excess bag material just below uppermost holes on longer sides then secure edges with tape ensuring a snug fit inside your monotub fruiting chamber. Be meticulous about this stage because any light leaks could thwart uniform mushroom growth.
Your newly transformed tub is now ready to be filled with substrate and become an ideal space for raising mushrooms indoors! But first things first: let's delve into how exactly you should prepare this growing medium in our next section - 'instructions for preparing the substrate'.
Instructions for Preparing the Substrate
Let's dive right into how to prep the substrate for your mushroom cultivation. If you're following a specific mushroom tek, like the shroom monotub, there are essential steps in preparing your bulk substrate.
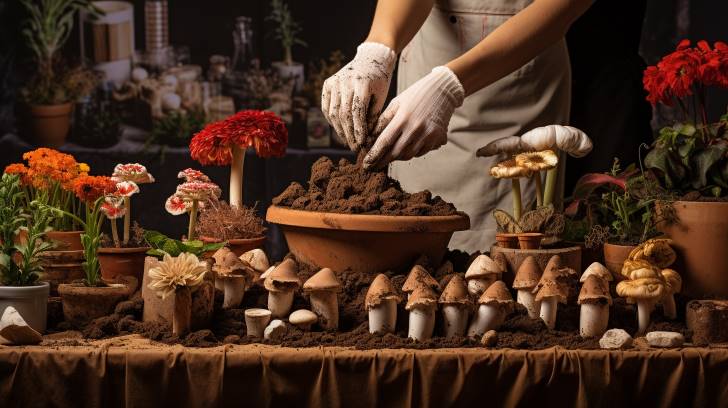
Begin by hydrating half a brick of coco coir in an 18-20-liter bucket. You'll do this by boiling 1.75-2 liters of water and pouring it over the coco coir. After covering the bucket, let it rest for about 15 minutes until it reaches field capacity.
Next, you combine 3.75 liters of cow manure with two teaspoons of hydrated lime and 5 liters of coarse vermiculite in a large tote. Add in your hydrated coco coir and thoroughly mix these components.
Then comes the part where grow bags come into play. Transfer this mixture into one such bag, removing any excess air before sealing it securely. You'll need to create small holes at the top—covered with micropore tape—for ventilation during cooking.
Pressure cook this bag for approximately 90 minutes at a pressure setting of around 103kPa, then allow it to cool overnight.
Now that you have prepped your substrate according to the instructions for preparing the substrate, empty its contents onto your tub mushrooms' growing area—the bottom of your monotub—and position spawn on top evenly without compressing anything down too much.
Cover everything up with aluminum foil—puncturing holes on top—and conceal these using micropore tape as well. Fill larger openings near the tub's top with densely packed Poly-Fil before fitting on the lid securely.
Instructions for Fruiting the Monotub
As you transition to the fruiting phase of your monotub setup, there are vital steps that need meticulous attention. Firstly, you'll remove the lid and aluminum foil, then replace the Poly-Fil to ensure optimal air exchange. Following this, it's crucial to mist the interior and substrate regularly while being mindful of placement and environmental conditions; finally, maintaining humidity levels becomes key for successful mycelium growth.

Step 1: Remove the Lid and Aluminum Foil
Start by removing the lid and aluminum foil from your monotub. This is a crucial step for many mushroom cultivators in their growing mushrooms at home journey. When you're using your magic mushroom kit, this action initiates the transition from colonizing to fruiting conditions inside your mushroom fruiting chamber.
Let's break it down:
- The removal of the lid and foil allows fresh air exchange (FAE), which is essential for various species of mushrooms.
- It helps release accumulated CO2 within the monotub that could otherwise inhibit growth.
- It creates an environment with optimal humidity and airflow, both vital conditions for successful mushroom cultivation.
Step 2: Replace the Poly-Fil
Having successfully removed the lid and aluminum foil in the previous step, you're now ready to proceed with dub tub tek. Step 2 involves replacing the Poly-Fil in your monotub setup to ensure the healthy growth of your tub mushrooms. This material swap is crucial to maintaining a hygienic environment for tek mushrooms' development.
Here is a simple breakdown:
| Action | Importance | Result |
|---|---|---|
| Remove Old Poly-Fil | Eliminates potential contaminants | Cleaner growing conditions |
| Insert Fresh Poly-Fil | Provides new filtering material | Reduced risk of contamination |
| Securely Fasten Lid | Prevents unfiltered air flow | Stable and controlled environment |
Your mushrooms in a monotub require fresh air exchange, which is facilitated by this vital replacement. By following these steps accurately, you promote an optimal environment for mushroom cultivation, contributing significantly to their overall yield and health.
Step 3: Mist the Interior and Substrate
Now that you've replaced the Poly-Fil in your monotub, it's time to shift focus to the vital step of misting. Maintaining appropriate humidity levels is crucial for successful mushroom cultivation. Here are three steps to guide you through this process:
- Begin by misting the sides and lid of your tub with water. This creates a microclimate conducive to mushroom growth.
- Next, lightly spray the surface of the substrate with water. Be cautious not to oversaturate it as this can lead to bacterial contamination and hinder your golden teacher monotub yield.
- Finally, ensure that you've evenly distributed moisture throughout the substrate in your monotub.
This process is crucial in maintaining optimal humidity levels for fruiting mushrooms effectively, enhancing their hydration, and promoting better yields. Now that you've properly set up your growing environment, let's transition into 'Step 4: Placement and Environmental Conditions' to continue optimizing conditions for ideal growth.
Step 4: Placement and Environmental Conditions
In this step you'll need to focus on the placement and environmental conditions of your setup to ensure optimal mushroom growth. Place the tub away from direct sunlight, which can dehydrate your substrate and impede mycelium development. Ensure it's in a room with a stable temperature; fluctuations may stress the mycelium, slowing its growth or causing contamination.
Maintaining a temperature range between 20-25 degrees Celsius is crucial. Temperature outside this range may hinder mycelial growth and disrupt fruiting cycles. Your mushrooms are living organisms, sensitive to their environment just like any other plant life.
These exact conditions aren't merely suggestions—they're key factors in fostering ideal growth and maximizing yield. So, be vigilant about controlling these variables accurately for a successful mushroom cultivation experience.
Step 5: Maintaining Humidity Levels
Now, let's move on to the next step which is maintaining proper humidity levels for your mushrooms, so they can thrive and produce a bountiful yield. It's crucial to ensure that the relative humidity level within the monotub hovers between 85-90%. This creates an optimal environment for mycelium growth.
Here are five steps to help you maintain these levels:
- Monitor: Use a digital hygrometer to keep track of the humidity level inside the tub.
- Mist: Use a spray bottle to mist the inside of the tub and surface of the bulk substrate daily.
- Ventilate: Ensure adequate ventilation but avoid dry conditions which can lower humidity too much.
- Check the monotub regularly: Regular inspection will assist in identifying any issues early.
- Mushroom Humidifier: If you struggle with keeping up humidity levels, consider using a humidifier.
Step 6: Encouraging Growth
Let's move into the next step which is 'Encouraging Growth', a crucial stage where you'll start to see the fruits of your labors. A few days following proper placement and misting, the first pinheads will emerge. To stimulate continued growth, improve airflow by slightly opening the lid and moisten both the substrate surface and tub walls.
| Step | Action | Outcome |
|---|---|---|
| 1 | Proper Placement & Misting | Emergence of First Pinheads |
| 2 | Enhance Airflow (Crack Lid) | Stimulated Growth |
| 3 | Misting Substrate & Tub Walls | Maintained Humidity |
This detailed approach helps in maintaining favorable conditions for mushroom life, fostering ongoing growth. Now that we've paved the way for growth, let's move on to step 7: casing the substrate and initiating fruiting'.
Step 7: Casing the Substrate and Initiating Fruiting
Now, we're entering step 7: casing the substrate and initiating the fruiting process. This process involves adding a layer of coco coir to your substrate and hydrating it thoroughly. This is vital as coco coir provides a secure environment for your mushroom hyphae knots or pins.
Here's how you do it:
- Carefully remove the lid from your grow tub.
- Apply a 1/2 to 1-inch layer of 100% coco coir. It's an effective alternative to vermiculite and works well as a casing material.
- Fully hydrate the casing by spraying water until it is thoroughly soaked.
Make sure to spray the tub daily and keep the lid slightly offset for increased airflow. Remember, precision and consistency are key in this delicate but rewarding process.
Step 8: Harvesting and Cleaning
Once your mushrooms have reached the desired stage, it's time to harvest them using sterilized scissors or a knife. The optimal phase for this is typically before the mushroom caps have fully flattened out, signaling peak maturity. To prevent contamination, sterilize your harvesting tools with an isopropyl alcohol solution. This kills any harmful bacteria that might interfere with the delicate mycelium ecosystem. After harvesting, store your fresh yield in a cool and dry location to preserve their quality and extend their lifespan.
Next, clean your monotub thoroughly and sterilize it again using isopropyl alcohol. This prepares it for another growth cycle by eliminating residual spores or pathogens.
The next step involves understanding humidity and ventilation in maintaining a conducive environment for mushroom growth.
Step 9: Humidity and Ventilation
Maintaining the right balance of humidity and ventilation is crucial for your mushrooms' optimal development. A controlled environment with a specific humidity range between 70-85% is essential for mushroom cultivation.
- Create a Humidity Tent: By placing a layer of plastic wrap over the top of the container, you can create an ideal moisture-retention zone. Puncture several holes in the wrap to enable sufficient ventilation.
- Misting: Regularly misting inside your tent with a spray bottle helps maintain desired humidity levels, simulating nature's dewfall or light rain showers.
- Monitoring: Keep an eye on your growth progress, adjusting the level of misting as necessary based on visual cues like mycelial growth and fruit body formation.
Step Up Your Monotub with the Best Humidifiers!
Achieving the ideal conditions in your monotub or indoor greenhouse starts with the right humidifier. Whether you're using monotubs or advanced equipment, our guide reveals the top humidifier choices for high-quality mushroom growth.Click here to learn which humidifier complements your setup best!
Maximizing Your Monotub Yield: Tips and Tricks
You'll want to pay close attention to conditions such as temperature, humidity, and air exchange throughout the entire growing process to maximize your mushroom yield. The ideal temperature for most mushrooms is around 75°F (24°C), but this can vary slightly depending on the species. A digital thermometer can help you monitor and maintain this parameter.

Humidity is crucial for mushroom development; it should generally be between 95% to 100% during colonization and around 85%-90% when fruiting. Overly dry conditions can lead to poor growth or even death of mycelium, while too wet environments might promote bacterial contamination. To balance this, use a hygrometer and mist your monotub with distilled water regularly.
The importance of proper air exchange or ventilation cannot be overstated. Air exchange ensures carbon dioxide released by mushrooms doesn't accumulate excessively within their environment since high CO2 levels can induce premature pinning and malformed caps. Stale air can stunt growth and induce other issues like mold infestation. A decent rule of thumb is to exchange the air in your grow area at least once per hour. Ensure your monotub has enough holes drilled into it - about six on each side should suffice - covered by micropore tape or polyfill fiber.
In addition, timing is key in maximizing yield. Harvest your mushrooms just before or as soon as the veil underneath the cap starts to tear for optimal spore production. Overripe mushrooms produce fewer fragments, leading to lower yields.
Lastly, don't forget about substrate depth – a thicker layer often results in larger yields but also requires more time for full colonization.
With all these tips under your belt, you're now well-equipped to optimize every aspect of your mushroom cultivation process. Let's wrap things up next with some final thoughts on Monotub Tek Methodology.
Monotub Mushroom Guide: Cultivating Magic Mushrooms Made Simple
After exploring a myriad of tips and tricks to maximize your yield with the Monotub Tek Method, it's time to wrap up this comprehensive guide. You've journeyed through every stage of the process, from setting up your monotub and preparing your substrate, to ensuring optimal conditions for mushroom growth.
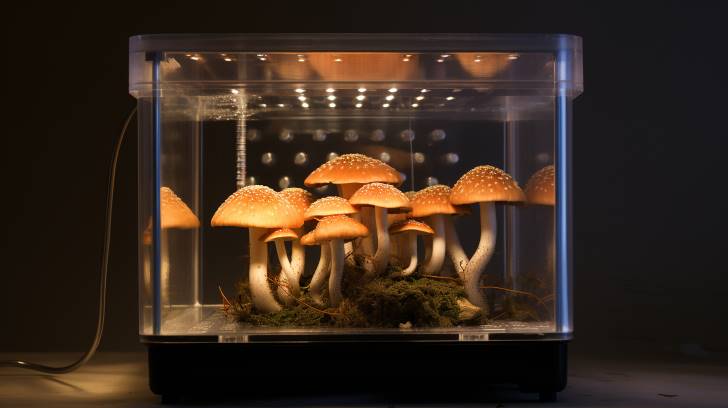
In conclusion, growing magic mushrooms using a monotub is an efficient and straightforward process that can lead to satisfying yields when done right. Remember:
- Patience is key: Cultivating mushrooms isn't an overnight process. It takes time for mycelium to fully colonize the grain bag and even longer for fruiting bodies to mature.
- Attention to detail matters: A sterile environment is crucial in preventing contamination which could jeopardize your entire crop.
- Experimentation can be rewarding: Feel free to try out different substrates or mushroom species until you find what works best for you.
- Safety first: Always handle materials such as spore syringes or sterilized grain bags with care.
Whether you're a seasoned grower looking for new techniques or a beginner stepping into the fascinating world of mycology, this guide provides all the information needed for successful cultivation using the Monotub Tek Method.
As with any scientific endeavor, remember that knowledge is power - but the application of knowledge is where real power resides! So get started on your next batch today; soon enough you'll be reaping bountiful harvests of high-quality, potent magic mushrooms right at home!
Monotub Magic Awaits
Ready to start your own mushroom cultivation journey using the Monotub Tek Method? Discover everything you need, from monotubs to substrate, at FunGuy Mushroom Supply. Explore our premium mushroom grow kits, grain spawn bags, and mushroom growing supplies. Don't miss out on the opportunity to grow your own magic mushrooms. Click here to visit FunGuy Grow Supply now!
Frequently Asked Questions
How to make a monotub?
When making a monotub, you'll need to choose a large plastic tub with a perforated lid for air exchange and fruiting. Here is a step-by-step guide on how to make your own monotub:
- Select the right size: Choose a tub that is large enough to hold your substrate and allow for proper colonization and fruiting. A 66-quart tub is commonly used, but you can adjust the size based on your needs.
- Prepare the lid: Using a drill, create several holes in the lid of the tub. The number of holes will depend on the size of your tub, but aim for between 10-20 holes evenly spaced across the lid. These holes will provide adequate air exchange and allow light to enter.
- Create additional side ventilation: To further enhance airflow, drill small holes along the sides of the tub near the top edge. These extra vents will improve gas exchange within the monotub.
- Apply high-efficiency particulate air (HEPA) filter: Attach a HEPA filter over one or more of the drilled holes to prevent contamination from entering while still allowing for sufficient air circulation.
How to tell when mycelium is fully colonized?
You can tell mycelium is fully colonized when it has an off-white color with no brown, blue, or green spots and a strong, earthy mushroom smell. At this stage, the mycelium has spread throughout the substrate and consumed all available nutrients. The pinheads formation is another indicator of full colonization. These tiny protrusions are the first signs that mushrooms are about to develop.
When examining the mycelium, you should observe a firm and compact texture. There should be no visible patches of uncolonized substrate remaining. If there are still areas that appear untouched by the mycelium, it may indicate incomplete colonization or contamination.
It is important to wait until the mycelium is fully colonized before proceeding to the next step in your cultivation process. Harvesting prematurely can result in underdeveloped mushrooms with limited potency and yield.
Once you have confirmed that your mycelium is fully colonized, you can proceed to induce fruiting. This involves triggering specific environmental conditions that stimulate mushroom growth. By manipulating factors such as light exposure, humidity levels, and temperature fluctuations, you can create an ideal environment for fruiting.
Transitioning from colonization to fruiting requires careful attention and adjustment of these parameters. Understanding what triggers mushroom fruiting will allow you to optimize your growing conditions and achieve successful yields of high-quality mushrooms.
What triggers mushroom fruiting?
To trigger mushroom fruiting, it's crucial to manipulate factors such as light exposure, humidity levels, and temperature fluctuations to create an ideal environment. By optimizing these conditions, you can stimulate the growth of fruiting bodies and ensure a successful harvest. Here are four key factors to consider when trying to trigger mushroom fruiting:
- Light exposure: Mushrooms require specific light conditions to initiate the fruiting process. They typically thrive in dim or indirect light rather than direct sunlight. You can achieve this by providing artificial lighting with a color temperature between 6500K and 7500K for around 12-16 hours per day.
- Humidity levels: Maintaining proper humidity is essential for mushroom fruiting. The optimal range is generally between 85% and 95%. To achieve this, you can use a humidifier or mist the growing area regularly with distilled water. It's important to avoid excessive moisture buildup, which can lead to mold growth.
- Temperature fluctuations: Mushroom species have different temperature preferences for initiating fruiting. However, most common cultivated mushrooms thrive within a range of 60°F (15°C) and 75°F (24°C). To induce fruiting, you may need to expose your mushrooms to lower temperatures for a short period before gradually increasing them.
- Air circulation: Proper air circulation helps promote healthy mushroom development by preventing the buildup of carbon dioxide and ensuring sufficient oxygen exchange. Using fans or ventilation systems can help maintain adequate airflow within your growing environment.
How can I speed up mycelium growth?
Now that you understand what triggers mushroom fruiting, let's discuss how you can speed up the growth of mycelium. By optimizing certain conditions, you can create an ideal environment for rapid mycelium growth.
First and foremost, temperature plays a crucial role in promoting mycelium growth. Maintaining a temperature between 24-27°C is optimal for speeding up the process. If the temperature falls below or exceeds this range, it may hinder the growth rate.
Next, ensuring high humidity levels is essential. Aim for humidity levels around 95-100% to create a moist environment that promotes mycelium expansion. High humidity prevents drying out of the substrate and helps facilitate nutrient absorption.
Regular air exchange is also critical for mycelium growth acceleration. It provides fresh oxygen to fuel respiration and removes carbon dioxide produced during metabolic processes. This exchange helps maintain healthy mycelial activity.
While light isn't necessary for mycelium growth, providing a small amount of light can stimulate its development. Natural or artificial light sources with low intensity can be beneficial in enhancing overall growth rates.
Lastly, using a nutrient-rich substrate will provide the necessary fuel for robust mycelial expansion. The substrate should contain ample carbohydrates, proteins, vitamins, and minerals to optimize nutrition uptake.
To help visualize these factors and their impact on mycelium growth acceleration, refer to the table below:
| Factors | Optimal Range | Impact on Mycelium Growth |
|---|---|---|
| Temperature | 24-27°C | Promotes faster growth |
| Humidity | 95-100% | Prevents drying out |
| Air Exchange | Regular | Facilitates respiration |
How much substrate for a monotub?
The amount of bulk substrate needed for a monotub will depend on its size and desired depth. Here are some guidelines to help you determine the appropriate amount:
- Measure the dimensions of your monotub: Start by measuring the length, width, and height of your monotub. This will give you an idea of the total volume that needs to be filled with substrate.
- Calculate the volume: Multiply the length by the width and then multiply that result by the height to calculate the total volume of your monotub in cubic inches.
- Determine substrate depth: Decide on the desired depth of your substrate, which is typically recommended to be between 3-5 inches. Multiply this depth by the area calculated in Step 2 to get an estimate of how much bulk substrate you'll need.
- Adjust for spawn ratio: Keep in mind that you'll also need to account for adding colonized grain spawn between layers of bulk substrate. The general rule is to use a thin sprinkling of spawn between each inch layer, so make sure to factor this into your calculations as well.
What is the best temperature for mycelium growth?
The optimal temperature for mycelium growth is typically reported to be between 22-24 °C. This range provides the ideal conditions for truffle mycelium to thrive and develop. It is important to maintain a consistent temperature within this range throughout the growth process to maximize yields.
At temperatures below 22 °C, mycelial growth may slow down significantly, leading to longer colonization times and potentially reducing overall productivity. Conversely, temperatures above 24 °C can hinder mycelial growth and even cause it to cease altogether. Therefore, it is crucial to monitor and control the temperature carefully during cultivation.
Maintaining a stable environment at the recommended temperature range promotes optimal metabolic activity within the mycelium. This ensures efficient nutrient absorption, energy production, and reproduction. Additionally, it encourages healthy hyphal development and prevents the formation of undesirable structures or mutations in the mycelium.
To achieve this optimal temperature, various methods can be employed. Using a dedicated incubation chamber equipped with adjustable heating elements or utilizing heat mats can help regulate and maintain the desired temperature range consistently. Monitoring devices such as thermometers or digital probes should also be used regularly to ensure accurate readings.
How do I keep my fruiting chamber humid?
To keep your fruiting chamber humid, you can use misting spray bottles or install a humidifier specifically designed for mushroom cultivation. Maintaining the right humidity level is crucial for successful mushroom growth. Here are four methods to help you achieve optimal humidity in your fruiting chamber:
- Misting spray bottles: These are a simple and effective way to increase humidity. Fill the bottle with water and mist the inside of the chamber several times a day. This will create a fine mist that settles on the surface, increasing moisture levels.
- Pond misters: These devices create a fog-like mist by atomizing water droplets, which can be evenly distributed throughout the chamber using fans. Pond misters provide consistent and controlled humidity levels, making them an excellent option for larger setups.
- Fans: By placing fans strategically in your fruiting chamber, you can circulate air and prevent stagnant pockets of moisture from forming. Proper airflow helps distribute humidity more evenly and reduces the risk of mold or bacterial growth.
- Perlite: This natural mineral can be used as a humidity regulator in your fruiting chamber. Simply place a layer of soaked perlite at the bottom of the chamber and keep it moistened with regular watering or spraying.
Will mushrooms grow more if the moisture is increased?
Increasing the moisture level in the substrate may result in a higher yield of mushrooms. The level of moisture plays a crucial role in mushroom cultivation as it directly affects their growth and development. When the substrate has an optimal moisture content, it creates a favorable environment for mycelium colonization and fruiting body formation. The mycelium, which is the vegetative part of the fungus responsible for absorbing nutrients, requires adequate moisture to expand and proliferate effectively.
Maintaining proper moisture levels in the substrate is essential to ensure successful mushroom cultivation. If the moisture content is too low, it can hinder mycelial growth and limit mushroom production. On the other hand, excessive moisture can lead to over saturation of the substrate and create conditions that are conducive to contamination by bacteria or mold.
To increase moisture levels in the substrate, there are several methods you can employ. One effective way is misting or spraying water onto the surface of the substrate using a clean spray bottle. This helps to evenly distribute water throughout the growing medium without causing excessive saturation. Another method involves adding additional water to the substrate itself by pouring or injecting it into designated areas.
It's important to monitor and adjust humidity levels regularly during mushroom cultivation. A hygrometer can be used to measure relative humidity within your growing environment. By maintaining an ideal humidity range between 80-90%, you provide optimum conditions for mushroom growth.
Best monotub tek?
If you're looking for the most effective technique for growing mushrooms at home, the best option is the monotub tek. This method has been proven to produce exceptional results, with high yields and minimal effort. Here's why monotub tek is the top choice for mushroom growers:
- Optimal Environment: Monotub tek provides an ideal environment for mushroom growth by creating a controlled space where all the necessary factors can be easily regulated. From temperature and humidity to light exposure and air circulation, every aspect can be fine-tuned to create the perfect conditions for your mushrooms to thrive.
- Easy Setup: Setting up a monotub is straightforward and requires minimal supplies. All you need is a plastic tub, some substrate material like coco coir or vermiculite, and mushroom spawn. The process involves layering the substrate and spawn in the tub, ensuring proper moisture levels, sealing it up, and letting nature take its course.
- Efficient Use of Space: While monotubs may not be as compact as other methods like grow bags or jars, they make efficient use of space by maximizing yield per square foot. With their larger size and ability to hold multiple flushes of mushrooms, monotubs allow you to harvest more mushrooms with less effort.
- Consistent Results: One of the greatest advantages of monotub tek is its reliability. Once set up correctly and maintained properly, this method consistently delivers impressive results in terms of both quantity and quality of harvested mushrooms.
References
- Gwon, J. H., Park, H., & Eom, A. H. (2022). Effect of Temperature, pH, and Media on the Mycelial Growth of Tuber koreanum. Mycobiology, 50(4), 238–243. https://doi.org/10.1080/12298093.2022.2112586
- Bellettini, M. B., Fiorda, F. A., Maieves, H. A., Teixeira, G. L., Ávila, S., Hornung, P. S., Júnior, A. M., & Ribani, R. H. (2019). Factors affecting mushroom Pleurotus spp. Saudi journal of biological sciences, 26(4), 633–646. https://doi.org/10.1016/j.sjbs.2016.12.005
- Lofgren, L. A., & Stajich, J. E. (2021). Fungal biodiversity and conservation mycology in light of new technology, big data, and changing attitudes. Current biology : CB, 31(19), R1312–R1325. https://doi.org/10.1016/j.cub.2021.06.083
- Grimm, D., & Wösten, H. A. B. (2018). Mushroom cultivation in the circular economy. Applied microbiology and biotechnology, 102(18), 7795–7803. https://doi.org/10.1007/s00253-018-9226-8
- Rodriguez, Alma & Jimenez-Gasco, Maria del Mar & Royse, Daniel. (2009). Improvement of yield of Pleurotus eryngii var. eryngii by substrate supplementation and use of a casing overlay. Bioresource technology, 100, 5270-6. https://doi.org/10.1016/j.biortech.2009.02.073
